Knowing how to clean a Cuisinart coffee maker helps you enjoy better-tasting coffee and maintain your machine’s performance. Coffee oils, leftover grounds, and mineral deposits can build up over time, affecting the flavor and brewing speed. Regular cleaning keeps the removable parts fresh and helps prevent internal buildup.
Whether you use a basic drip coffee maker or a model with a self-cleaning function, the right cleaning method depends on your machine. Always check your model’s instruction manual before starting, especially when descaling the internal components.
Why Should You Clean a Cuisinart Coffee Maker?
Regular cleaning removes coffee residue, oily stains, and mineral deposits that accumulate during everyday use. These deposits may affect the brewing process and leave an unpleasant taste in your coffee. A clean machine also makes your daily coffee routine more enjoyable.
Cleaning the removable parts after use and descaling the machine when needed can help maintain consistent performance. It also allows you to identify stains, blockages, or other maintenance issues before they become more difficult to address.
What You Need to Clean Your Coffee Maker
Before you begin, gather a few basic cleaning supplies. Most routine cleaning tasks require only common household items and do not need special equipment.
Warm water
Mild dish soap
A soft sponge or microfiber cloth
Distilled white vinegar, if approved by your model’s manual
A clean towel for drying removable parts
Avoid abrasive scrubbers, harsh chemicals, and excessive water around electrical components. If your machine has a charcoal water filter, check the instructions for removing or replacing it before descaling.
How to Clean a Cuisinart Coffee Maker Step by Step
Follow these steps to clean the removable components and remove internal mineral buildup safely. The exact controls and cleaning cycle may differ between Cuisinart models.
Step 1: Turn Off and Unplug the Machine
Switch off your coffee maker and unplug it from the electrical outlet. Allow the machine and any recently brewed coffee to cool before handling the carafe, filter basket, or other removable components.
Remove any leftover coffee and used grounds. Starting with a cool, empty machine makes routine cleaning easier and reduces the risk of burns or accidental electrical contact.
Step 2: Remove and Wash the Removable Parts
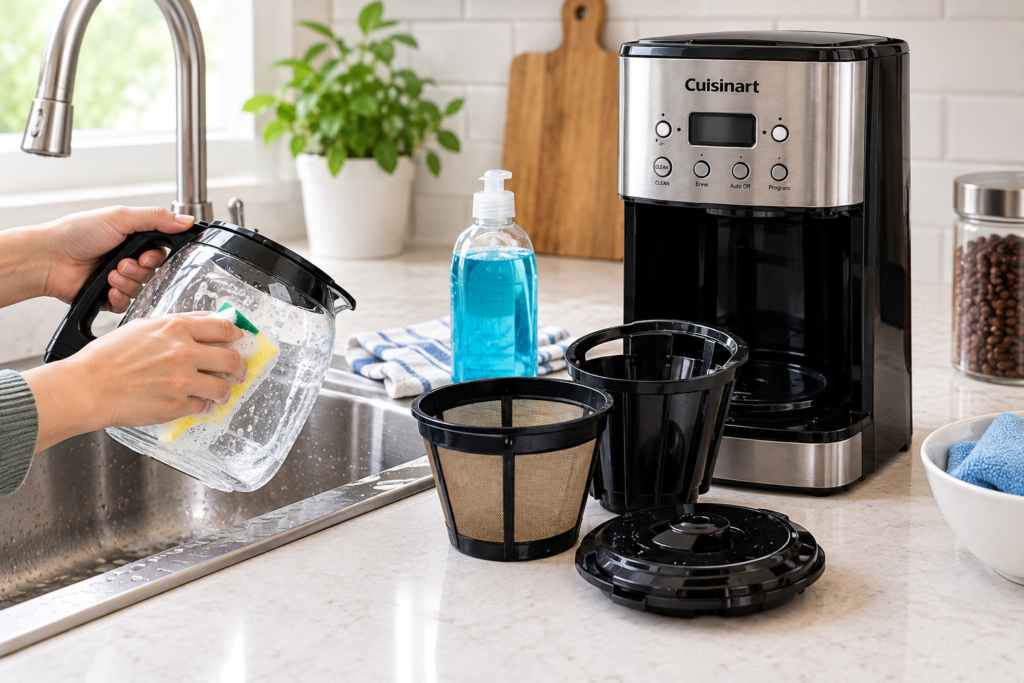
Take out the carafe, lid, filter basket, and other removable components according to the manufacturer’s instructions. Wash compatible parts with warm water and mild dish soap, using a soft sponge to remove coffee oils and residue.
Rinse each component thoroughly and allow it to dry. Some parts may be dishwasher-safe, but check your model’s manual before placing them in a dishwasher.
Step 3: Clean the Water Reservoir
Empty any remaining water from the reservoir. If the reservoir is removable, clean it according to the manufacturer’s instructions; otherwise, wipe accessible surfaces with a clean, damp cloth.
Do not immerse the coffee maker’s electrical base in water. Avoid leaving lint or cleaning residue inside the reservoir, and allow the parts to dry as directed before reassembling the machine.
Step 4: Descale the Internal Components
Descaling removes mineral deposits that can accumulate inside the machine as water passes through its heating system. These deposits may slow brewing and affect the coffee maker’s performance over time.
If your model supports vinegar descaling, follow the cleaning solution ratio and procedure specified in its manual. Many Cuisinart drip coffee makers use a mixture of one-third white vinegar and two-thirds water, but this is not a universal instruction for every model.
For model-specific cleaning instructions, read the official Cuisinart coffee maker cleaning guide
Step 5: Run the Cleaning Cycle
If your coffee maker has a CLEAN button or a dedicated descaling mode, activate it according to the manufacturer’s instructions. Place the empty carafe correctly under the coffee outlet before starting the cycle.
For models without a dedicated cleaning function, use the manual’s approved descaling procedure instead of assuming that every machine works the same way. Never add coffee grounds during a cleaning cycle.
Step 6: Rinse the Machine With Fresh Water
After the descaling cycle finishes, empty the carafe carefully and follow the manual’s rinsing instructions. Many models require one or more complete brewing cycles with fresh water to remove remaining vinegar or cleaning solution.
Allow the machine to finish each cycle before discarding the water. If a vinegar smell or taste remains, consult the manual to determine whether another fresh-water rinse is needed.
Step 7: Wipe the Exterior and Reassemble
Use a soft, damp cloth to wipe the machine’s exterior and remove fingerprints, splashes, and dust. If your model has a warming plate, let it cool completely before cleaning it according to the manufacturer’s directions.
Dry the removable components and reinstall them correctly. Replace or reinstall the water filter as instructed, and make sure the machine is ready for normal use before brewing coffee.
How Often Should You Clean a Cuisinart Coffee Maker?
The ideal cleaning schedule depends on how frequently you brew coffee, your water quality, and your particular model. Daily cleaning helps remove fresh residue, while descaling is needed less frequently.
Here is a practical maintenance schedule to follow, adjusting it whenever your manufacturer’s instructions recommend a different interval.
| Component | Suggested Cleaning Frequency |
|---|---|
| Carafe and filter basket | After each use |
| Removable lid and other washable parts | After use or as needed |
| Exterior surfaces | Weekly or when dirty |
| Internal descaling cycle | When the indicator appears or as directed in the manual |
| Charcoal water filter | Replace according to the model’s instructions |
Hard water can cause mineral deposits to form more quickly, so your machine may need descaling more often. Always prioritize the maintenance schedule specified for your exact model.
Common Mistakes to Avoid When Cleaning a Coffee Maker
Even a simple cleaning routine can cause problems if you use the wrong products or methods. Incorrect cleaning may damage your coffee maker or affect the taste of your coffee. Understanding common mistakes helps you maintain your appliance safely and effectively. Always follow the manufacturer’s cleaning instructions for your specific model.
Using Too Much Cleaning Solution
Using a stronger cleaning mixture does not always produce better results. An incorrect vinegar concentration or an unapproved cleaner may damage internal components. It can also leave an unpleasant smell or taste in your coffee. Always follow the recommended solution ratio in your coffee maker’s manual. Never mix vinegar with bleach or other cleaning chemicals.
Forgetting to Rinse After Descaling
Skipping the rinsing process can leave vinegar residue inside your coffee maker. This residue may affect the smell and taste of your next cup of coffee. After descaling, empty the carafe and follow the manufacturer’s rinsing instructions. Run the recommended fresh-water brewing cycles to remove any remaining cleaning solution. Make sure the machine is properly rinsed before preparing coffee again.
Scrubbing With Abrasive Materials
Using steel wool, rough scouring pads, or abrasive cleaners can scratch your coffee maker’s surfaces. These materials may damage the carafe, removable components, or exterior finish. Instead, use a soft sponge or microfiber cloth for routine cleaning. Mild dish soap and warm water are usually sufficient for removable parts that allow this cleaning method. Always check the manufacturer’s instructions before treating stubborn stains.
Ignoring the Cleaning Indicator
If your coffee maker has a CLEAN indicator, pay attention when it signals that maintenance is needed. Follow the instructions for your model rather than ignoring the light or repeatedly resetting it without cleaning the machine.
Tips for Keeping Your Cuisinart Coffee Maker Clean
A few simple habits can reduce buildup and make routine maintenance easier. Empty the used grounds promptly, wash the carafe after brewing, and avoid leaving old coffee in the machine for long periods.
Use fresh water for brewing and keep the exterior free from spills. Check the water filter regularly and replace it when required by the manufacturer. These small steps help keep your machine ready for everyday use.
For more appliance-care advice, read our guide on how to clean commercial kitchen equipment and follow the cleaning recommendations appropriate for each appliance.
Final Thoughts
Learning how to clean a Cuisinart coffee maker is an important part of maintaining your kitchen appliances. Washing removable parts regularly, descaling when required, and rinsing thoroughly can help preserve coffee flavor and support reliable brewing.
For the safest results, follow the cleaning instructions for your exact model. With a consistent maintenance routine, you can keep your coffee maker cleaner and ready for your next cup.
- All Posts
- Buying Guides
- Commercial Kitchen
- Kitchen Equipment
- Product Reviews
- Tips & Maintenance